Windows DFIR Part 1 - Creating Forensic Images
Introduction
Digital Forensics and Incident Response (DFIR) in Windows environments presents unique challenges that require a structured approach and proper tooling. This two-part series focuses on establishing a foundational DFIR workflow for organizations. Part 1 covers the essential steps of forensic image acquisition and initial triage, ensuring organizations can properly preserve evidence during security incidents and prepare for potential expert analysis.
Prerequisites
Required Tools
- FTK Imager - Industry-standard forensic imaging tool
- Arsenal Image Mounter - Forensic image mounting utility
- Kroll Artifact Parser/Extractor (KAPE) - Triage and artifact collection tool
Additional Resources
- TCM Security Academy - Practical Windows Forensics
- Blue Cape Security - Building a Forensic Workstation
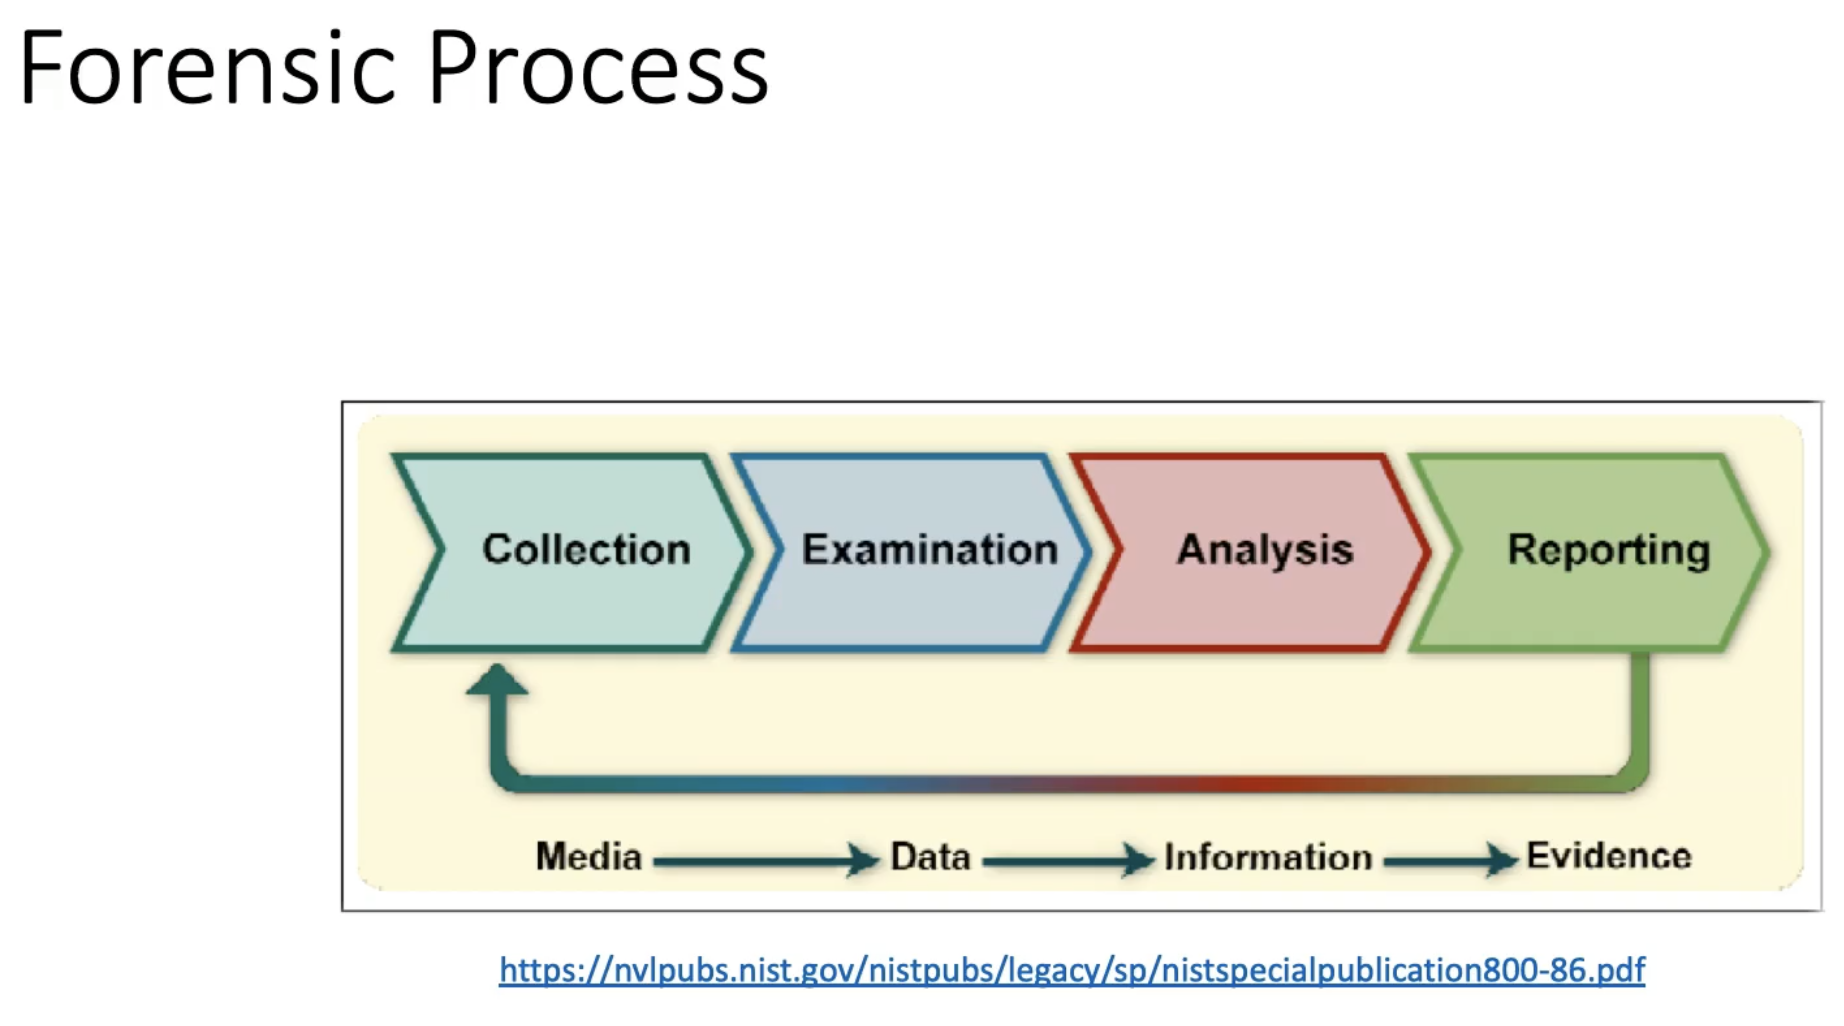
Forensic Process Overview
The forensic acquisition process follows a critical order: memory acquisition first, followed by disk imaging. This sequence is essential because:
- Memory contains volatile data that is lost upon system shutdown
- System state must be preserved for accurate analysis
- Network isolation is crucial before acquisition
Important: When containing a potentially compromised system, isolate the network by disconnecting ethernet cables or disabling wireless adapters. Never immediately shut down the system, as this destroys volatile evidence.
Evidence Acquisition
Memory Acquisition
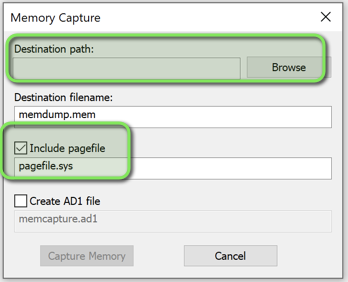
- Prepare an external drive or network share with sufficient storage capacity
- Launch FTK Imager and select the memory acquisition option
- Configure the destination and enable pagefile inclusion for comprehensive memory capture
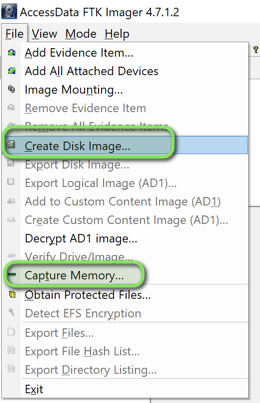
Disk Imaging
- Select the Physical Drive option to ensure complete data capture, including deleted files
- Choose appropriate destination storage
- Initiate the imaging process
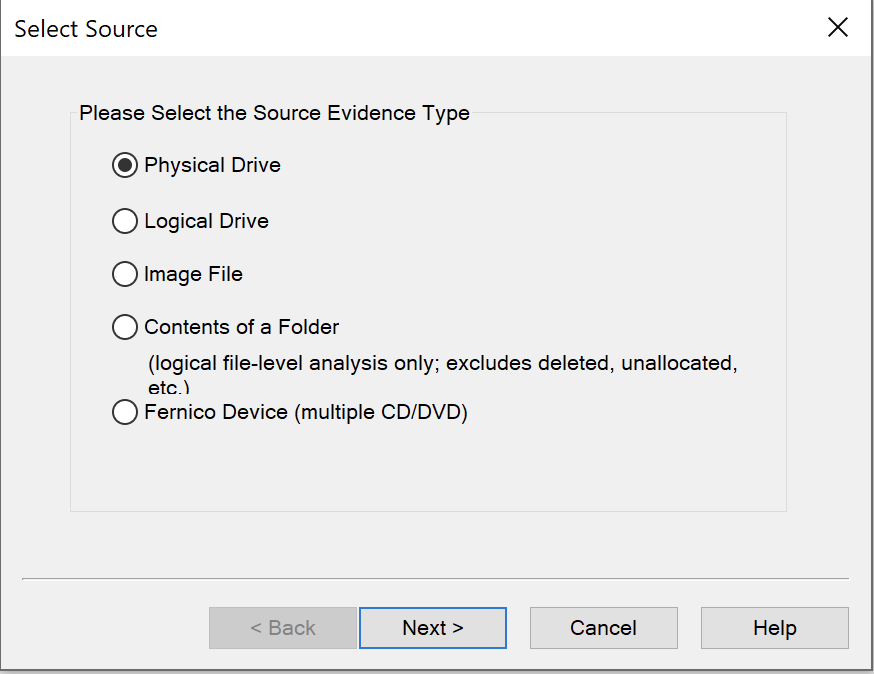
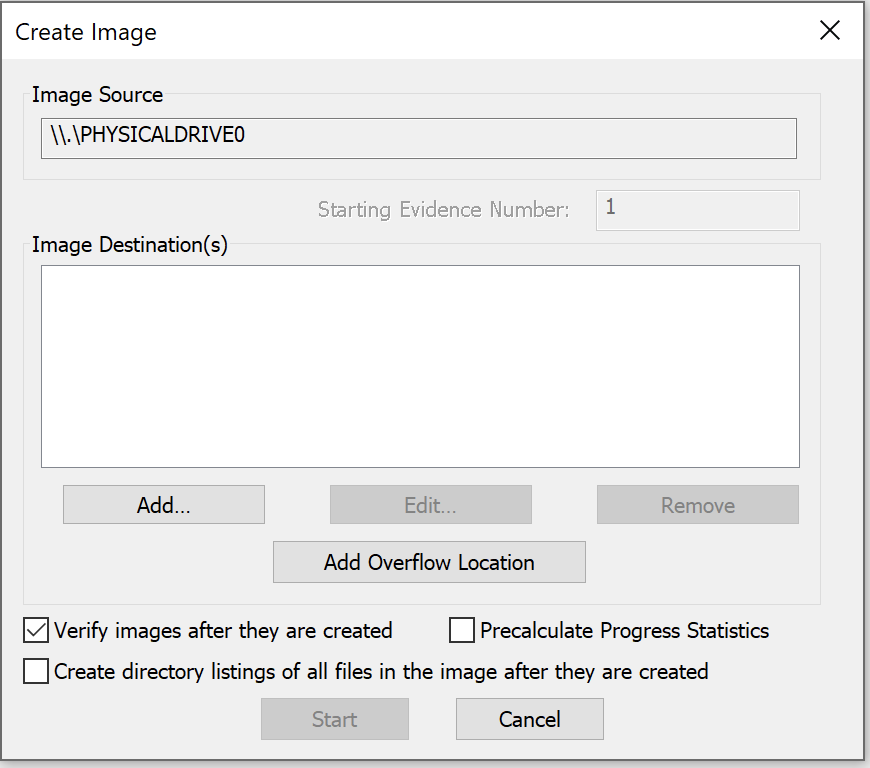
Image Analysis Preparation
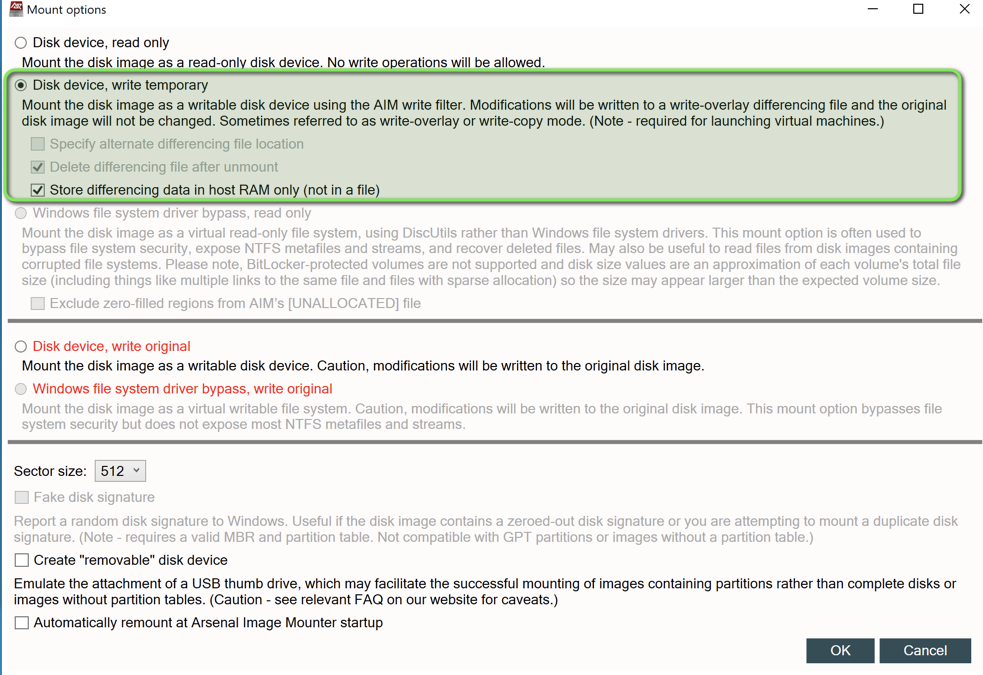
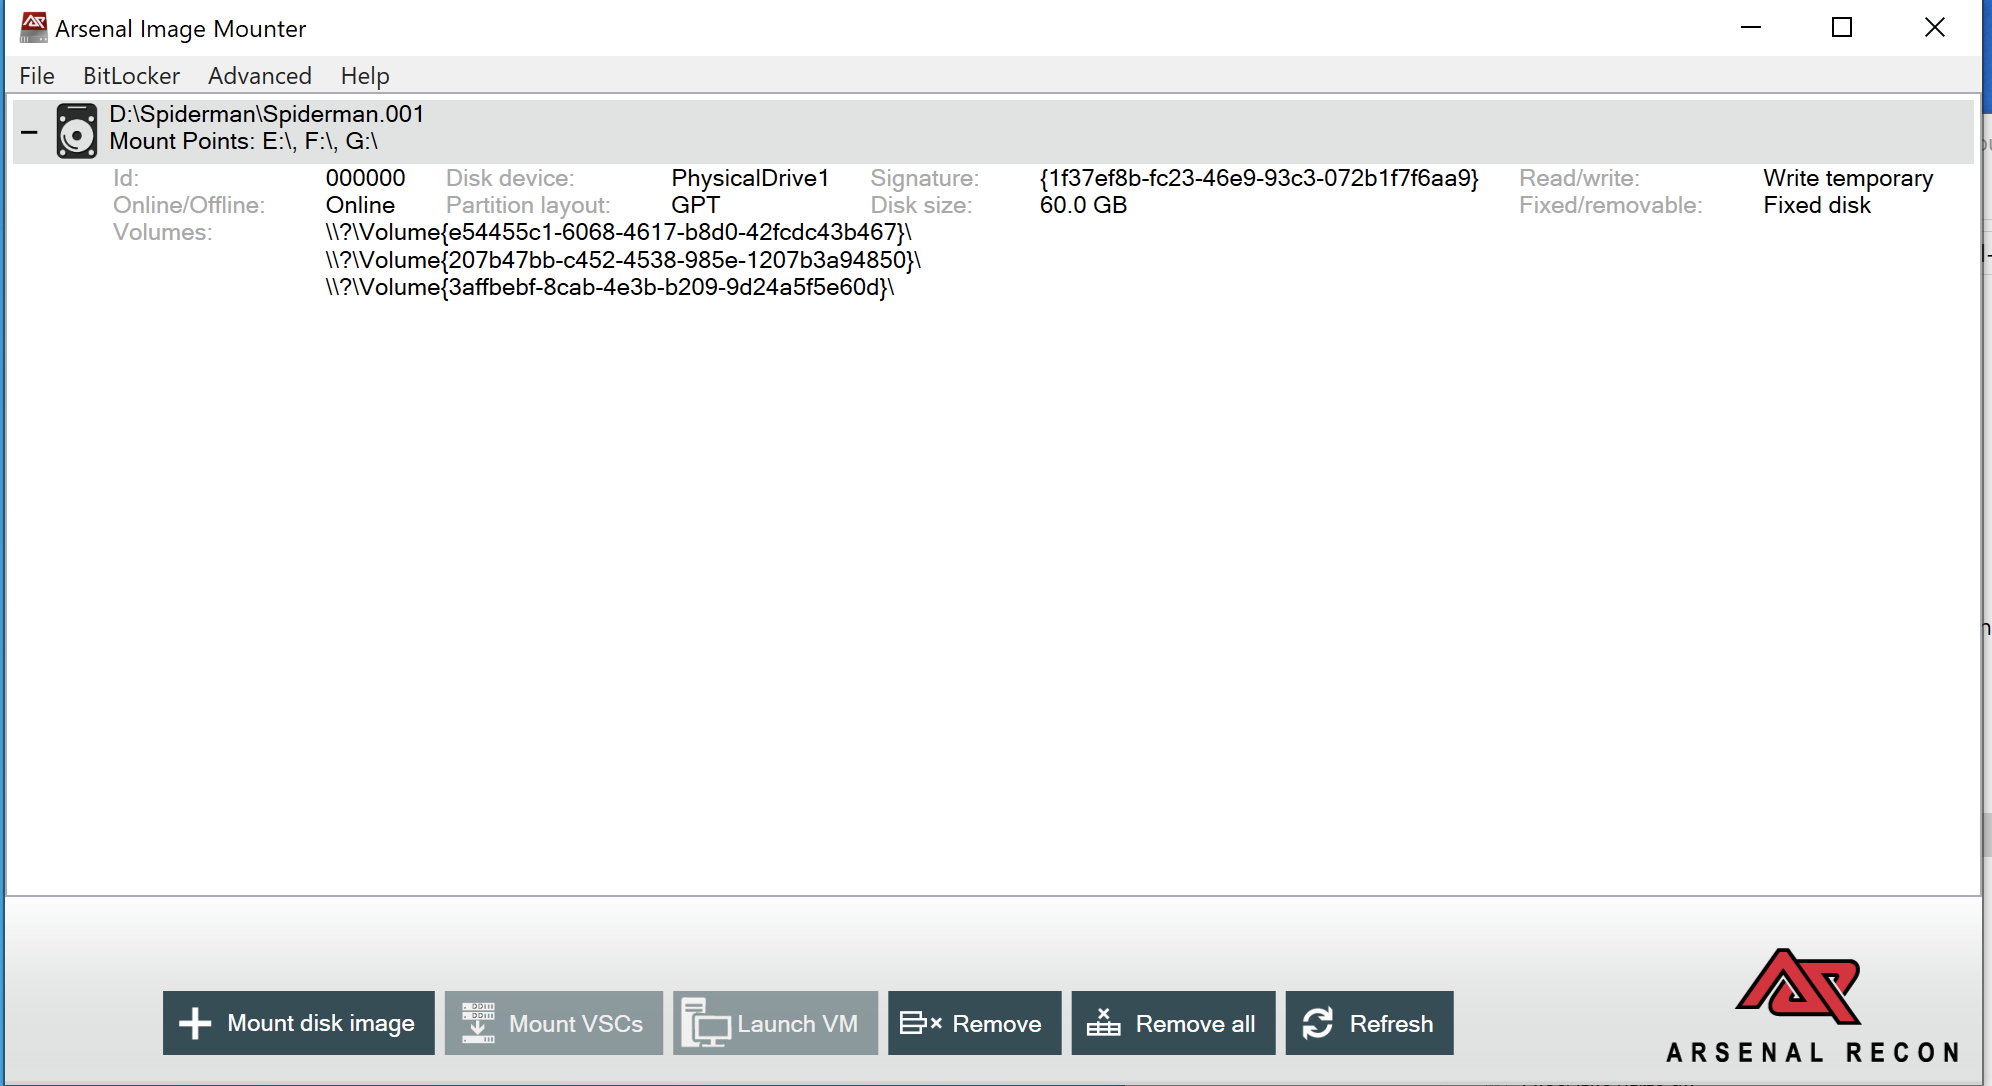
Mounting the Forensic Image
Arsenal Image Mounter enables analysis of the captured disk image:
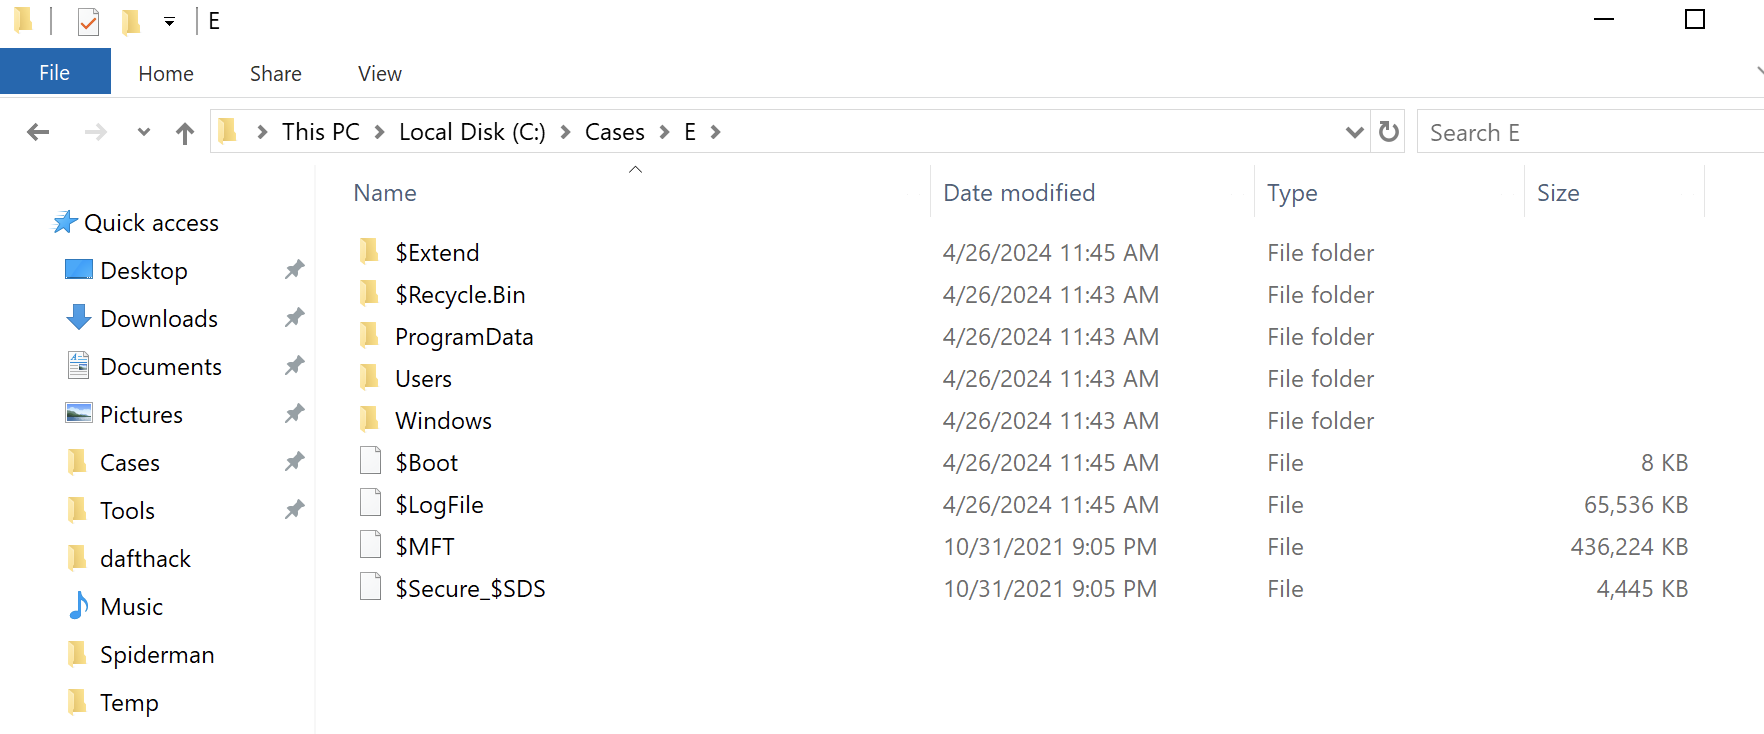
- Select the image file from its storage location
- Configure mounting options as shown below
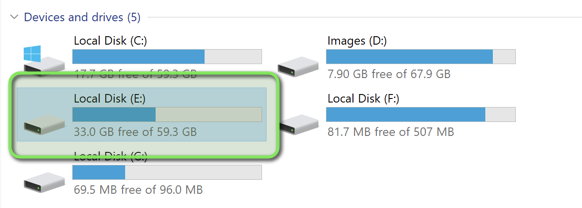
- Verify successful mount and drive letter assignment
Artifact Collection with KAPE
KAPE streamlines the triage process through predefined artifact collections:
- Launch KAPE’s graphical interface
- Select the mounted image as the target source
- Specify a destination for collected artifacts
- Use the “KAPETriage Compound” option for comprehensive event log collection

Command Line Alternative:
.\kape.exe --tsource E: --tdest C:\Cases --tflush --target KapeTriage --gui

The resulting collection provides a structured set of artifacts for analysis:
Conclusion
This guide demonstrates the fundamental steps for proper forensic image acquisition and initial triage using industry-standard tools. While other tools may offer faster acquisition times, FTK Imager and KAPE provide a reliable, well-documented workflow suitable for both internal analysis and expert handoff.
The combination of proper memory capture, full disk imaging, and structured artifact collection creates a solid foundation for incident response. KAPE’s modular approach offers additional automation capabilities worth exploring for advanced workflows.
Part 2 of this series will focus on detailed artifact analysis using specialized DFIR tools and techniques.
I hope that you enjoyed this writeup. Until next time, take care.